
Since my full documentation is written in the german, i will try to explain the most important things here in english. There will be an explaination for the used hardware and software. Also the coordinate messurement and converting system will be shown.
You can find my german documentation here KinectOpenSimUpload.
Hardware :
Lets start with the Microsoft Kinect Camera V.2. In the previous projects i always used the old 360 camera, but to get the most detailed body coordinates i needed to upgrade my setup. The new Kinect has a better video and depth camera resolution. Also it has more 5 new body points that can be recorded. If you want more detail hardware specifications just go to this site here.
Software:
For this project i used Microsoft Visual Studio 2013 Ultimate for the programming part and OpenSim for the body movement reconstruction. Since there are a lot of tutorials i will not explain VS 2013 and move on to the body movemente analyse software OpenSim. To be honest there a only a few Tutorials and Explainations for this software and i had a lot of problems to get it work. So i will try to explain the most important functions and how to get them work.
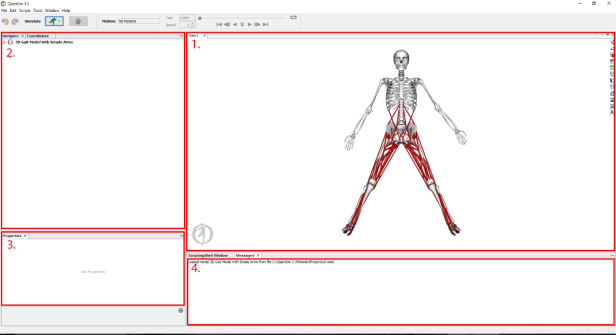
If you start OpenSim you will see something like the window above. In this example there is loaded model. I will show later how to get used to skeleton models.
- Viewbox Window
- Navigation Window
- Properties Window
- Message Window
1.Viewbox Window
In this Window you can zoom and rotate your skeleton model. Every movement will also be shown here. At the right side of the viewbox you will find a few tools.
 Change the Background Color
 Show the X, Y and Z axis
 Camera focused on negative X-Axis
 Camera focused on positiv X-Axis
 Camera focused on negative Y-Axis
 Camera focused on positive Y-Axis
 Camera focused on negative Z-Axis
 Camera focused on positive Z-Axis
 Screenshot
 Record movement
 Record movement with a non focused camera
 Implement three dimensional objects
2.Navigator Window
The Navigator Window is used to change the options of your loaded model. In the following picture you can find an example of a skeleton model.
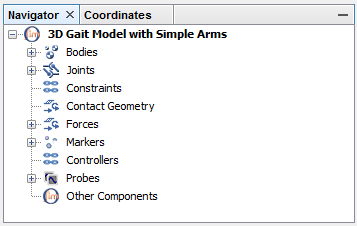
The model options are splittet up in nine different areas. Since this projects doesn’t aim on constructing a fully working model i will not go in detail about every area here. The only real important part for us here is the “Markers” area. Markers are the points we want to give ourer kinect coordinate data. We will take a look on this system at a later point of this documentation.
3.Properties Window
At this window you find all properties of the momentary selected item. The following picture shows what you see when you select the model in the navigator window.
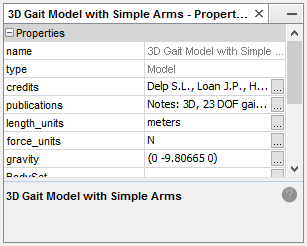
OpenSim will show you the name and the basic informations of the loaded model. For example you can see in witch lengh units it is constructed. This can be really helpfull if you work with american models since they have a different metric system.
4.Messages Window
Thiw Window works like a console and show you the history of the current OpenSim session. It also gives out errors if there is a failure in a calculation.
Program sequence:
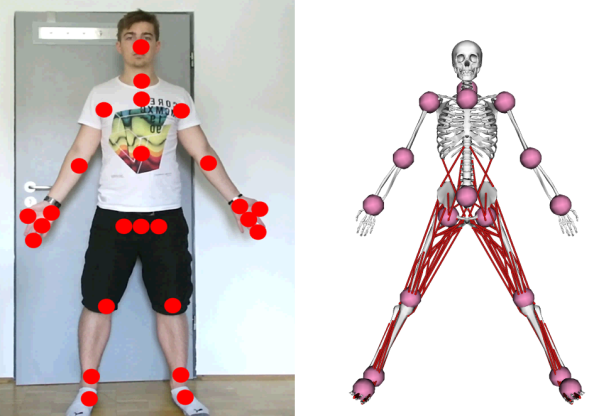
When the application is started you should see the color stream of the Kinect camera on your desctop. If you move into the working field of the camera the programm will draw red dots on your body. This dots show every joint point that will be recorded. If you want to start the record, you have to bring your Arm on the red circle located on your torso. If you want to stop it you have to activate the point located on your neg. You find the hole sequence in the video section of this project or just click here.
Record and converting of the kinect data:
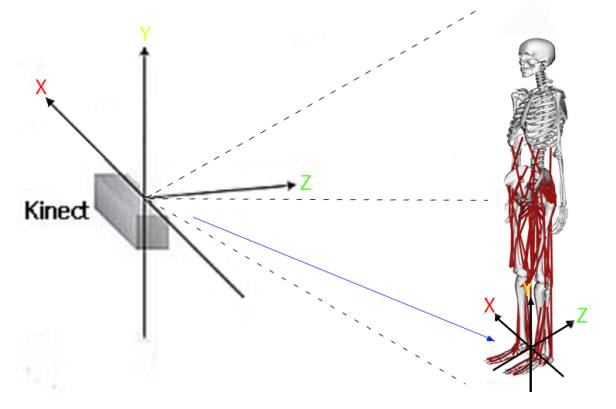
To use the kinect coordinate data in OpenSim we have to convert it into the right coordinate system and the right format. The kinect coordinate origin is located at the center of the camera. But the OpenSim coordinate origin is located between the feets of the human body. Also the OpenSim coordinate Systems has a different localisation for the X and Z Axis. To get this fixed an axis rotation is needed.
We start with the transfer of the coordinate origin. Following picture shows the operation.
To get this work we have to do a simple calculation.

The NewCoodinateSystem is based on the X Value of HipCenter and the Y and Z Value of AnkleRight. So everytime you messure the joint Points of the Kinect Camera you just need to substract it from the coordinates of the NewCoordinateSystem. To rotate the coordinate system to get the X and Z axis in the right location for OpenSim we take a look at the following picture.
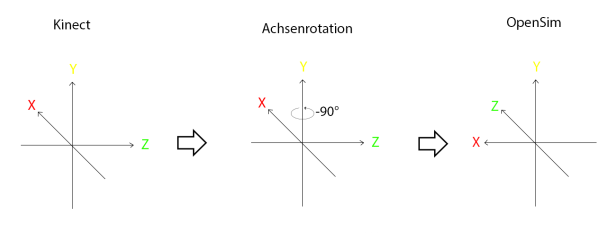
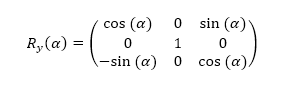
“Achsenrotation” stands for the rotation of the coordinate System. It has to be rotated for -90 degrees around the Y axis. To get this done we have to multiply the coodinate data of the NewCoordinateSystem with the following matrix.
Now the coordinate data is calculated in the right system. To load it into OpenSim we have to convert it in a final step to the right data format. Therefore we need the TRC data format.
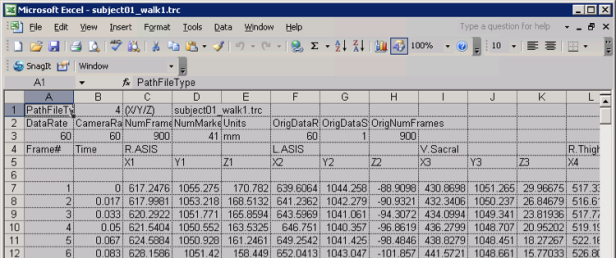
At the end the recorded data needs to be in the format you see in the picture above. So we need to arrange it in frame, time and the X,Y and Z value of the current joint point. I managed to get this work with easy writelines command. The space between the values needs to be seperated with tabs. Since VS 13 is not capable of refreshing the data everytime in the same steps you will have different timestemps every time. I tried to get at least around 60ms between every frame at the end.
In the next step we want to get the .trc file to be loaded into OpenSim. To get this done you need to start it and load a model. Since my joint points are arranged to fit on a specific model you should take the same model. You can find it here.
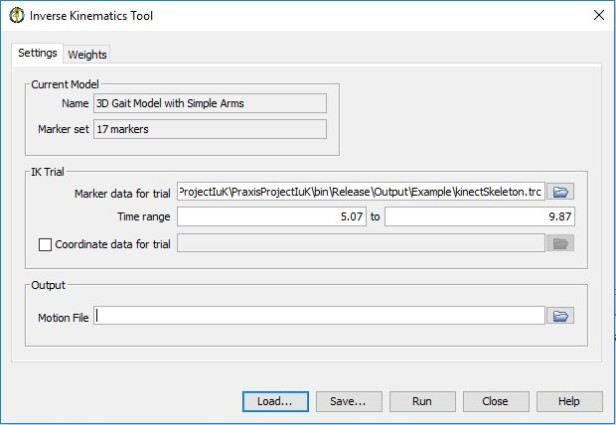
Now you have to start the inverse kinematics tool. The file.trc can be loaded at the “Marker data for trial” option. To get the movement calculated you have to press the “Run” button.
The joint data of your kinect will now be simulated on the marker points of the OpenSim skeleton model. The following picture shows how they were selected.
This is only a short documentation of this project. If you have still questions feel free in the comments and i will try to help you.
